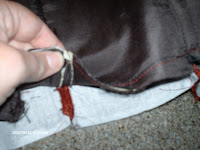
With the lining completed it's time to turn my attention to the actual outer fabric of the dress.
 Just like with the lining, I start my process by ironing on the interfacing, sewing the front to the front sides, sewing the back to the back sides, and finishing up with the side seams and the shoulder seams. When I finish, the outer fabric should match the lining perfectly. If I'm off by even a half inch, I go back and figure where I deviated from the lining.
 Next, I move to pressing out the seams. To minimize the bulk in the dress, I've picked up the habit of trimming my seams before I press them. Using this technique keeps the sides of the bodice straight and stops the rounding of the seams that can sometimes happen if you leave the full 5/8ths seam allowance between the outer fabric and the lining.
Sewing the Porcupine:
Some people wonder what I mean about sewing a porcupine. The answer: This term comes from my numerous blood letting experiences that happen when I unite the outer fabric and the lining. The huge quantity of pins required for these steps alone make your bodice a rather formidable opponent.

Unlike sewing many garments, on a renaissance bodice, you want to pin the good sides facing out. I've found that by matching the inner seams of the bodice- (pinning them together) and then going back and pinning the rest of the fabric you get a better look to the bodice. Because I don't like slip in my sewing, I usually put my pins 1 inch to 1 1/2 inches apart.
 I also prefer to do the base of my bodice first. This goes against many of my mentors. (In fact, I may be hunted down by one of my Shakespearean Festival costume shop supervisors if they ever find out about this blog- Sorry Sharon.) To support my inclination, I've found that the bottom edge of your bodice is extremely important to the line of your dress. Because the neckline can be adapted in so many ways, it is my opinion it is better to have the bottom perfect.
 In sewing the main fabric and the lining together, I try to keep the seams fairly narrow. I also sew the armseye at this time. It usually isn't called for by the pattern instructions, but again I hate slipping. If arm holes are sewn, then I don't have to worry about anything pulling out of place and having problems later on when I'm inserting the sleeve.
Once again with Bias:
 Now that both the main fabric and the lining have been seamed together, it's time to deal with any ugly lines. My first job is to cut off any excess lining, interfacing, or main fabric. I'm using a double fold 1/4 inch bias tape. I like the look of the thinner line, but it is difficult to manage and requires more blood loss due to the numerous pins required to tack it down successfully.
I've found that putting on bias is easier if I place the bodice on the dressmaker's dummy. that way I can account for any pull or corners in pinning down front edge of the bias tape. Stitching on the fold, I go around the entire bodice.

Once I sew the bias to my outer fabric, I fold the bias around the edge of my garment and whip stitch the bias onto the lining. I try to keep my stitches as even as possible. Curves and corners are tricky. I like to fold in the middle first then do the sides. This doesn't always make the prettiest corners, but it does help with the twisting that can sometimes happen if you try to continuously stitch around the entire bodice. (I'm still working on this technique.) The end result should be a finished edge around the perimeter of your bodice.
Making a bodice a corset:

Most bodices require a under-corset to keep the shape of the garment. I didn't like the bulk that this creates. From what I have seen, most Renaissance costumes add a good ten to twenty pounds just by the added bulk of the under garments. I know this is not very SCA of me, but I've modified the bodice to lace up more like a corset. It also gives the garment a very nice back and thins the wearer.
 Using the Joann's craft picture hangers (see my supplies list) I place them about 3/4 of an inch apart and tack them down. To minimize the irritation and chafing of the metal, I'll top these hangers with a piece of outer dress fabric once I've cut out my sleeves and skirt. Since I'll be using scrap fabric, I'll come back to this later in my blog.
I tack down the picture hangers using the holes provided as well as the edges of the triangular hanger itself. I put both sides on the lining of the fabric. This way when the lacing pulls the hangers together the fabric overlaps. I'll sew hooks and eyes on the outer fabric giving a smooth back illusion to the garment. I would do it right now, but my fingers are bruised and blistered from doing all the hand work for the bias. I'll finish this up in a couple of days. :)
Fixing problems:
There is only one way to explain this step- I put on the bodice and take a look at it in the mirror. I like to ask myself- are the lines right? Am I getting bulges in the side seams? Do I like the neckline? and Will the neckline work for what I am trying to do?
Trying it on, I've found that I like everything about the bodice, but the neck is a bit low for the inspiration picture.
 With that in mind, I added a piece of the red fabric to the upper edge of the bodice- by cutting a piece of fabric double wide of what I needed plus 5/8ths inch; folded it and ironed it, pinned it in place, and seamed as close to the bias tape as I could. The result I think is lovely...
To do list:
- Adding the fabric over the corseting,
- Hooks and eyes on the bodice back


No comments:
Post a Comment