Showing posts with label Elizabeth of France. Show all posts

Sunday, September 27, 2009

Elizabethan gown hemming basics

Six Days Away!!!!

I am officially 6 days away from the Minnesota Renaissance Festival Trip. I'm afraid that finishing the dress cut into my blogging time. I can sew ten times faster if I'm not taking pictures of each step. Thus, I missed the tutorial on how to make a partlet and the under sleeves. I will do my best to make another set after the fair and put on the information; however the Lynn McMaster's pattern for the Partlet is really easy to follow.


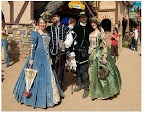
Here is the finished dress: I still have to tack on the jewelry and hooks and eyes here or there, but for the most part it is done. Yay!!! The billament trim, the sleeve pull backs, the hat pin, and the necklace are both from Sapphire and Sage Jewelry. Rhonda is an absolute marvel and I highly recommend her work.


A Hem.....

As promised here is my short tutorial on hemming. I suppose it all begins with a good friend to help you. It is important that you don't guess on your hemming. Because of the farthingale and especially the bum roll, (see Simplicity Pattern 8881) your dress does not hang the same way that a normal dress hangs. Thus it is important for you to actually put on the dress (If you are the one wearing it) and have the hem figured for your body.

The Pitfalls:

Too low a hem: There is a tendency for people who make beautiful renaissance dresses to lower the hem to the ground level. Frankly this is how it should be. The Hem should just brush the floor so you glide across like on a cloud. Unfortunately this means that you will pick up every speck of dirt, leaf, branch, blade of grass, wood chip, and dust particle in the fair... not to mention the garbage. To put it simply, if your hem touches the ground at a renaissance fair you will end up with a very dirty skirt.


Too high a hem:There is an old costumer adage. If you are on a stage hem low. If you are on eye level, hem high... but not too high. Those who have ruined a dress due to the pitfall above sometimes over hem and end up with a six inch gap between the ground and their hem. This isn't a good combination either. First of all, you can see your shoes and ANKLES!!!

For the record ankles at this time period are far worse to show than your
cleavage. So what's the right hem? I hem to the bottom of the netting on my farthingale. If you have no netting it is about three inches above the ground. From a spectator's standpoint your skirt will have the appearance of brushing the ground, without sweeping up the garbage in the fair.


Hem the underskirt.... then the over skirt: At times you will see this around the fair. This is my worst nightmare. In fact, I'm worried about it on the dress I'm making. However, there comes a time when you just have to trust your hemming buddy. In general you want to hem your over skirt a bit longer than your underskirt. Only by a half inch or so.... unless you are a pirate wench. :)

The Process:

Get Up High: I actually stand on a very sturdy coffee table, but in a pinch I've stood on a step stool as well. This is for the ease of your hemming buddy. It's a pain for them to sit all bunched over and being up high gives them a better perspective on the hem being straight.

What to Wear: You want to wear all of your costume. Not just all of the undergarments, you need to wear your bodice as well. Why? Because each piece of clothing effects how the garment hangs. When you add the bodice, make sure it is where you want the bodice to be. If you have not put in your hooks and eyes yet, have your hemming buddy do a double check to make sure that the skirt waist band is covered by the bodice. You should not see the skirt waist band at all. Also, make sure you wear the shoes that you will wear at the fair!!! This is very important! Every shoe makes you stand a different way.

How to stand: I know this is an odd topic. It's not really. After years in a costume shop, I have learned that where the arms are, makes a difference in the hem. So how do you stand? Stand straight, look forward not down, keep your arms to your side as much as possible.

Don'ts:
DO NOT: hold your hands in the singer position. (cupped hands at your waist line) DO NOT: put your hands on your hips. (This will raise your shoulders and cause you to push down the sides of the dress. DO NOT: Bring your hands together in the front or the back. (This tilts the dress and will make the hem off in the front or the back)

Keep your eyes ahead:

Did I mention to look straight ahead? It is really difficult to do this, because this is your baby and you want the hem to lie right. At this point you will just have to trust your buddy. :) Looking down, tilts the dress slightly forward which will make your hem slightly higher in the front than in the back.

Hemming Buddy Duties:

The Hemming Buddy's job is to fold the hem so you have an even line all around the base of the dress. I prefer that my hem is folded under. That way I don't have to remove pins in order to hem the skirt. I always go back and add another row of pins to keep me sane while I am hemming.

Hem the underskirt then the over skirt. I actually flip the over skirt over my neck and shoulders for the underskirt hemming. Yes, this will make the underskirt slightly higher than the over skirt, but as I mentioned above, this is a preferable look.

Iron:

Once you have been pinned and you carefully remove the dress, you can hem your skirt and underskirt. My first duty when I hem is to press around the base of the pinned hem. I do this for two reasons. 1) If a pin falls out, I have a ironed crease to show me where the hem was supposed to go. 2) It is actually easier to hem the dress when you have ironed down the dress edge.

Machine or Hand Stitch:

There is a stitch on the sewing machine that hems your garment. It requires you to sew on the salvage of the hem and the needle jumps over to the folded back dress and picks up one stitch. In general I prefer the machine stitch, but I know that my over skirt is way too heavy for the machine at this point so I'm going to hem the good old fashioned way- by hand.


Remember the bottom of your dress is wider than the top of your dress, thus you will have extra fabric you have to deal with. This is done with neat folds in the hem. You need to be careful making the folds so they don't do damage to the line of the dress. Take your time and experiment.


The hem stitch I use is to pick up the fold of the hem with a needle using a whip stitch, then pick up a 1/2 centimeter piece of the main dress, I jump an 1/2 inch and repeat the process.


When you are finished it is important to iron down your hem again. Here are two pictures. it is obvious when you see the dress which has not been pressed after hemming.

Before:


After:


I will post pictures after the fair.

I still have a few things to do before I leave. I need to finish tacking the jewelry to the bodice. I need to put the hooks and eyes on the bodice and skirt to make sure they stay in place.

That's it! Thanks for visiting. If you have any questions I'd be happy to answer. :)

Cheers!

Katherine

Sunday, June 21, 2009

Puff and Slash: The Art of Clothing Decoration

What is Puff and Slash?

I was going to work on the skirt, until I had a epiphany about how to sew the sleeves, so I went there. (Shrug)

Looking at the inspiration picture of Elizabeth of Austria, there is quite a bit of slash and puff work on her sleeves. In general I'm not really a fan of doing slash and puff because they tend to look messy. To do it well, it requires a lot of hand work and a great deal of faith. The name is really backward- it should be slash and puff, since the former can't happen without the latter- something that has always annoyed me. :)
I also tend to shy away from Puff and Slash because of the need for a chemise under your dress. Again, it causes extra bulk. Therefore I always try to mock puff and slash when I can. This will be an example of my mock style.


Where did this style come from?

In short- the Germans. The Landsknechts, German mercenary soldiers who thrived from approximately 1487 - 1556, became known for their outlandish dress and effective fighting tactics. They were the finest fighting force in Europe. Their clothing was characterized by its "puff and slash" decoration, created by cutting slashes in the outer garments and pulling puffs of the under garments through those slashes.


The "puff and slash" style of clothing was adopted by non-Germans too, becoming a standard mode of decoration in several parts of Europe. The English nobility was particularly enamored of puff and slash. Henry VIII started wearing it after seeing it on Landsknechts he had hired; in fact, the famous painting of Henry VIII by Hans Holbein depicts him in a doublet decorated with puff and slash. Other paintings of Henry depict him wearing what looks like a knee-length skirt; he adopted this style from German warskirts worn by some Landsknechts. Henry's children Edward VI and Elizabeth I also wore puff and slash.


Shortly thereafter the French picked up the style and used it extensively much due to Queen Catherine De Medici- she started wearing it in the mid 1500s. Catherine is responsible for many fashion trends in history including the high heal, the infamous corset, and wearing underwear- but more on my hero worship of this queen later. Since Catherine was the mother in law to Elizabeth it is not surprising to find the puff and slash styling on her dress. And in doing my research, I have also found the elusive lattice worn by Catherine herself. She had a great deal to do with the styling of this dress.

The Process:

I really can't take full responsiblity for my brainstorm regarding the Puff and Slash on this dress. The inspriation came from Simplicity Pattern 2589. For the undersleeve they provided a type of oval facing that you cut down the middle. I played around with it, and decided that I could use a device like it to style my dress.

For the sleeves I am using a combination of Simplicity Pattern 8881 and 2589. The majority of the sleeve will be done using 2589 since it has the Trumpet or Tudor Bell sleeve. However, it match the Elizabeth style, I needed to have a bit of a roll on the shoulder. I don't like regular shoulder rolls, I think they look bulky, but I could manage a puff to the sleeve. Trick was--- they all needed to be puffed and slashed. Difficult to do with the tudor upper sleeve which is supposed to be fairly tight against your arm.

First step in the process: I took out my pre-cut fabric pieces for the sleeve. Taking the puff from 8881, I first tacked down four pieces of interfacing in the desired locations for the slashing. It is important to make sure you leave the glue face up, I'll get to why later.


I then sewed tapering channels on top of the fabric, making sure they ended in points- not squares. Next, I took the scissors and cut down the center of the channels. I tried to get as close to the point as possible without cutting the seams.


Turning the sleeve over, I pulled the interfacing through the slit in the fabric and ironed down the interfacing. (The reason the interfacing must be face up.)


Next, I took my white fabric that I will be using for the inner sleeve and sewed rectangles of fabric over the slashes. I made sure that each piece of white fabric was at least an inch larger than I needed on all sides to give the fabric enough volume to puff.

Taking the puff I then basted gather lines on the top and bottom of the sleeve, sewed the side seams together, and gathered the upper-puff into a neat little ball. I then repeated the exact same process with the upper, fitted, Tudor sleeve.

In attaching them together I had to make a decision. Would I connect the puff completely to the tudor sleeve (similar to pattern 8881 or would I connect the puff to the bodice and then to the tudor sleeve. I decided for comfort. Renaissance costumes are difficult to move in- especially the sleeves. By using the puff as a top sleeve I gave myself a bit more room for arm movement- I'm afraid it's not very SCA, but I threw that out the window when I designed the dress with a Tudor sleeve. (Though I'm 75% sure that this is a possible style from the 1560-1580s in France.)

To fit these sleeves together I placed the right sides of both sleeves together. I matched the lower part of the puff to the upper part of the tudor sleeve and released the gathering on the puff to match the width of the Tudor upper sleeve. I sewed it making sure that I followed my inner gather seam, so it doesn't look messy.


Contrary to what the picture shows, I haven't actually attached it to the bodice yet. I wanted to see how it looks, so I pinned it. The inspiration pictures puff is a bit more narrow than mine. I'll fix that by using a greater seam allowance when I attach the puff to the bodice.


To ensure that the white will puff through, I hand stitched around the opening of each of the slashes, pulling the white out so it will naturally flow in that direction rather than falling back under the sleeve.


At this point, I'm also tacking my marks for the ouches. I'm giving about an inch and a half to two inches, between connections. Here again, I'm pulling out the white fabric to ensure a puff.

Next adding the ouches: This is a simple tack on over each of the stitched points.


You can see that this makes the sleeve less bulky. It's important to leave a little bit of room between your stitches on the lower sleeve. Otherwise you may make it too snug. I figure about an 1/8 of an inch does well enough.

Next: Sewing with Fur and finishing the oversleeve.

Wednesday, June 17, 2009

Of Pins and Blood:

Deja Vous:

With the lining completed it's time to turn my attention to the actual outer fabric of the dress.


Just like with the lining, I start my process by ironing on the interfacing, sewing the front to the front sides, sewing the back to the back sides, and finishing up with the side seams and the shoulder seams. When I finish, the outer fabric should match the lining perfectly. If I'm off by even a half inch, I go back and figure where I deviated from the lining.


Next, I move to pressing out the seams. To minimize the bulk in the dress, I've picked up the habit of trimming my seams before I press them. Using this technique keeps the sides of the bodice straight and stops the rounding of the seams that can sometimes happen if you leave the full 5/8ths seam allowance between the outer fabric and the lining.


Sewing the Porcupine:

Some people wonder what I mean about sewing a porcupine. The answer: This term comes from my numerous blood letting experiences that happen when I unite the outer fabric and the lining. The huge quantity of pins required for these steps alone make your bodice a rather formidable opponent.


Unlike sewing many garments, on a renaissance bodice, you want to pin the good sides facing out. I've found that by matching the inner seams of the bodice- (pinning them together) and then going back and pinning the rest of the fabric you get a better look to the bodice. Because I don't like slip in my sewing, I usually put my pins 1 inch to 1 1/2 inches apart.


I also prefer to do the base of my bodice first. This goes against many of my mentors. (In fact, I may be hunted down by one of my Shakespearean Festival costume shop supervisors if they ever find out about this blog- Sorry Sharon.) To support my inclination, I've found that the bottom edge of your bodice is extremely important to the line of your dress. Because the neckline can be adapted in so many ways, it is my opinion it is better to have the bottom perfect.


In sewing the main fabric and the lining together, I try to keep the seams fairly narrow. I also sew the armseye at this time. It usually isn't called for by the pattern instructions, but again I hate slipping. If arm holes are sewn, then I don't have to worry about anything pulling out of place and having problems later on when I'm inserting the sleeve.


Once again with Bias:

Now that both the main fabric and the lining have been seamed together, it's time to deal with any ugly lines. My first job is to cut off any excess lining, interfacing, or main fabric. I'm using a double fold 1/4 inch bias tape. I like the look of the thinner line, but it is difficult to manage and requires more blood loss due to the numerous pins required to tack it down successfully.

I've found that putting on bias is easier if I place the bodice on the dressmaker's dummy. that way I can account for any pull or corners in pinning down front edge of the bias tape. Stitching on the fold, I go around the entire bodice.


Once I sew the bias to my outer fabric, I fold the bias around the edge of my garment and whip stitch the bias onto the lining. I try to keep my stitches as even as possible. Curves and corners are tricky. I like to fold in the middle first then do the sides. This doesn't always make the prettiest corners, but it does help with the twisting that can sometimes happen if you try to continuously stitch around the entire bodice. (I'm still working on this technique.) The end result should be a finished edge around the perimeter of your bodice.


Making a bodice a corset:


Most bodices require a under-corset to keep the shape of the garment. I didn't like the bulk that this creates. From what I have seen, most Renaissance costumes add a good ten to twenty pounds just by the added bulk of the under garments. I know this is not very SCA of me, but I've modified the bodice to lace up more like a corset. It also gives the garment a very nice back and thins the wearer.


Using the Joann's craft picture hangers (see my supplies list) I place them about 3/4 of an inch apart and tack them down. To minimize the irritation and chafing of the metal, I'll top these hangers with a piece of outer dress fabric once I've cut out my sleeves and skirt. Since I'll be using scrap fabric, I'll come back to this later in my blog.


I tack down the picture hangers using the holes provided as well as the edges of the triangular hanger itself. I put both sides on the lining of the fabric. This way when the lacing pulls the hangers together the fabric overlaps. I'll sew hooks and eyes on the outer fabric giving a smooth back illusion to the garment. I would do it right now, but my fingers are bruised and blistered from doing all the hand work for the bias. I'll finish this up in a couple of days. :)


Fixing problems:


There is only one way to explain this step- I put on the bodice and take a look at it in the mirror. I like to ask myself- are the lines right? Am I getting bulges in the side seams? Do I like the neckline? and Will the neckline work for what I am trying to do?

Trying it on, I've found that I like everything about the bodice, but the neck is a bit low for the inspiration picture.


With that in mind, I added a piece of the red fabric to the upper edge of the bodice- by cutting a piece of fabric double wide of what I needed plus 5/8ths inch; folded it and ironed it, pinned it in place, and seamed as close to the bias tape as I could. The result I think is lovely...


To do list:
  1. Adding the fabric over the corseting,
  2. Hooks and eyes on the bodice back
I must say, I have a bodice that I really like. In order to let my fingers heal a bit, and ration out my fabric yardage, I'll be working on the overskirt and underskirt next.


Friday, June 12, 2009

Colors, fabric, and beads... Oh My!


The colors have been decided! I have wanted a red dress for a while now. Since I am making this a cold weather dress, I'm using more earthy colors. I like the idea of brick red, chocolate brown, and golds.

I was delighted with the selection of fabrics at Joanne's Fabric. I found a brick red heavy drapery fabric for the skirt, upper sleeves, and bodice back and sides. At 50% off I couldn't even bicker on the cost of the fabric. It came to about 5.00 a yard.

The image in my head adjusted when I discovered the paisley tapestry near by also 50% off. The colors are perfect and blend well with the brick red. I've decided to put this as the center front of my dress. By giving a contrast it will slim my waist. I plan to used this fabric on the under sleeves as well to give a repetition of print.


The underskirt was more difficult. I'm still not sure whether I'm going to be happy with the gold fabric I selected. I may find it too shiny, but I think it is ok. I liked the fact that it has a red undertone to it. I plan to reuse this as well in the lining for the fur sleeves.

Last but not least I wanted a nice faux fur. This is not easy to find in St. George, UT in the middle of the summer given that it is 105 today. However, I stopped at Target. I remembered that during Christmas they were selling faux mink throws. Sure enough there were two rolls on sale. Yay. It is a beautiful fabric and I knew I wouldn't have the strength to cut into it for the sleeves, so I bought both rolls. One for the dress and one for my couch. :)


As you can see I've also been working with the beading for the pearl lattice that sits over the partlet. I found some small craft beads 4mm and added 1mm rhinestones using bead glue. I strung eye wire through the bead and made a second loop. I attached a jump ring to either end.
Next using eyewire again, I strung six 6mm beads and made another loop on the other end. I attached two of these to each jump ring and connected them together. Voila! I'm 80% sure that this will work really well for the dress. :)

I've also been having problems coming up with the gemstones required for connecting the pucker and slash elements of the dress. If you look at the inspiration portrait, you can see that every pucker is connected with a pearl and rhinestone flower. While I can find pearls ringed by rhinestones, I don't know that I'm up for a $3.00 a button price tag. Once again I headed to the store. This time Roberts craft. There I found these great little beads. Inside each silver casing, is a clear plastic stone. I removed the stone and added a pearl. It works as a reasonable facsimile and I can't beat the price at $2.00 for ten.

The remaining items that I needed to pick up was boning, interfacing, needles, thread, oil for the sewing machine (Important if you want to take care of your machinery), and bias tape. I selected a chocolate brown. though I may break down and make my own if the fabric cooperates.

You may have noticed that I have not yet picked up the material for the partlet or the neck ruff. Since they will be the last elements that I do on this project, I will be holding off buying those items until a bit later.

Next Post: It's bodice time!

Elizabeth of Austria, Queen of France Gown


Introduction:

Once upon a time, before I was a history teacher, I used to work for the Utah Shakespearean Festival making renaissance gowns. What can I say? I became addicted. Now every year I design and make a gown. Partly because I love sewing them and partly because I love wearing them at Renaissance Fairs.

This year's construction is one of my biggest challenges yet. I intend to recreate the Elizabeth of Austria/ Queen of France gown. I fell in love with the unique bead work- especially the lattice work over the partlet.

Of course the dress does not show the lower portion of the gown, so I used artistic license to make something that I would truly enjoy wearing. I also added a tall hat to the design.

I have several dresses, but I've been wanting to create a winter style dress for a while now. With my design calling for a partlet and a double sleeve, I decided this would be the perfect dress to make for colder Renaissance Fairs- like Minnesota.
In recreating this dress, I will use the base of two patterns:

Simplicity 8881 (yes the infamous "Shakespeare in Love" gown) I like this pattern because of the boned bodice. Renaissance gowns can get bulky at times. This pattern especially the bodice can be made to give the conical look of the Elizabethan period and have minimal bulk.

Simplicity 2589: I've wanted to do a Tudor sleeve for quite some time now. Of course I wanted to keep the puff from the inspiration picture, so I will be adapting the sleeve.

I'm still undecided on the skirt. I prefer a circle skirt on my renaissance gowns. 1) because I like the reduction of bulk. Cartridge pleating can be a huge source of weight gain in the gown department. However, I love the idea of Simplicity 2589's skirt being attached to the bodice. It is more accurate to the actual period than the two piece style.

I will be doing both a neck and wrist ruffs for this gown. My first. In the costume shop, I would always avoid the ruff issue, so this will be new for me. What fun!

Of course I'm excited about the beading. I will actually be outsourcing the larger gemstones in the dress including the necklace and the trim around the neck of the bodice. I need it to be as accurate as possible and I'm not good at setting gemstones. I have decided, however, to recreate the lattice work myself.

The last element to this costume will be the tall hat. I did quite a bit of millinery during my years with the festival, and this is my second hat of this style.

Huge task, over 14 huge elements, six weeks! Here we go!!!!